How to use Unlimited Proxies - High Bandwidth of 711Proxy?
Configure Your Proxies
We support residential proxy authentication via API (IP Whitelist) or Username/Password. You may check the Authentication Methods documentation to familiarize yourself with the concept.
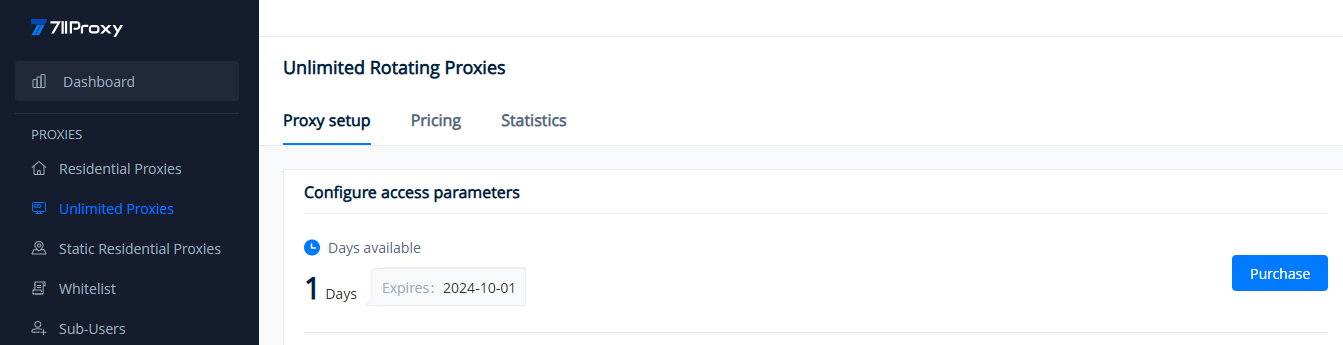
To configure your proxies, kindly navigate to the Unlimited Proxies > Proxy Setup section of your dashboard. Here you can view your current available hours or days.
Next, we will walk you through the proxy configuration methods for both API (IP Whitelist) and Username/Password, with detailed screenshots and clear instructions.
API: IP Whitelist Authentication - Get Host:Port
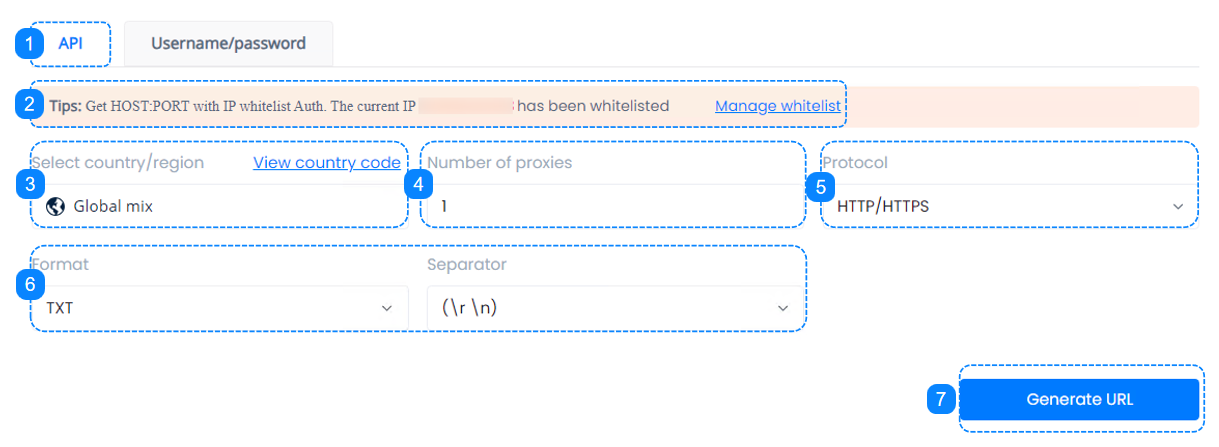
1. Click to enter the "API" dashboard to configure access parameters.
2. Add the IP addresses that will access your proxy service to the IP Whitelist, you may check our quick guide to IP Whitelist.
3. The country/region is set to random proxy locations by default, no need to select.
4. Select the number of proxies that you wish to generate, any integer from 1 to 900.
5. Choose the proxy protocol.
6. Choose the data format and separator, or keep the default options.
7. Click on Generate URL. Then on the right-hand side under "Get API URL", we can see the specifics reflecting the selections made above.
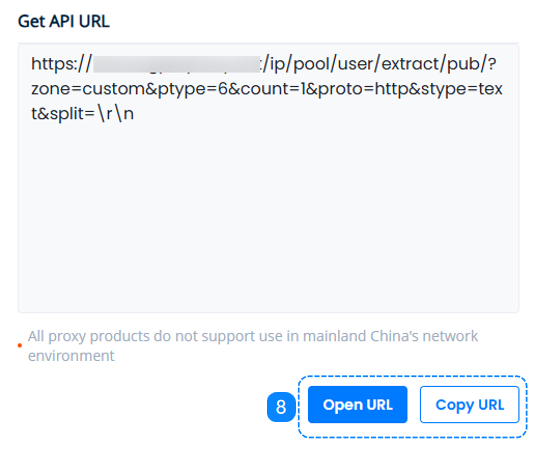
8. After the URL is generated, you may choose to copy the URL or open the URL, which will show you a list of generated proxies once opened. You may learn more on the API URL page.
The IP addresses in the list are the proxy host addresses and not the actual proxy IP addresses that you will be using.
Username/Password: Proxy Authentication via Username - Get Proxy List
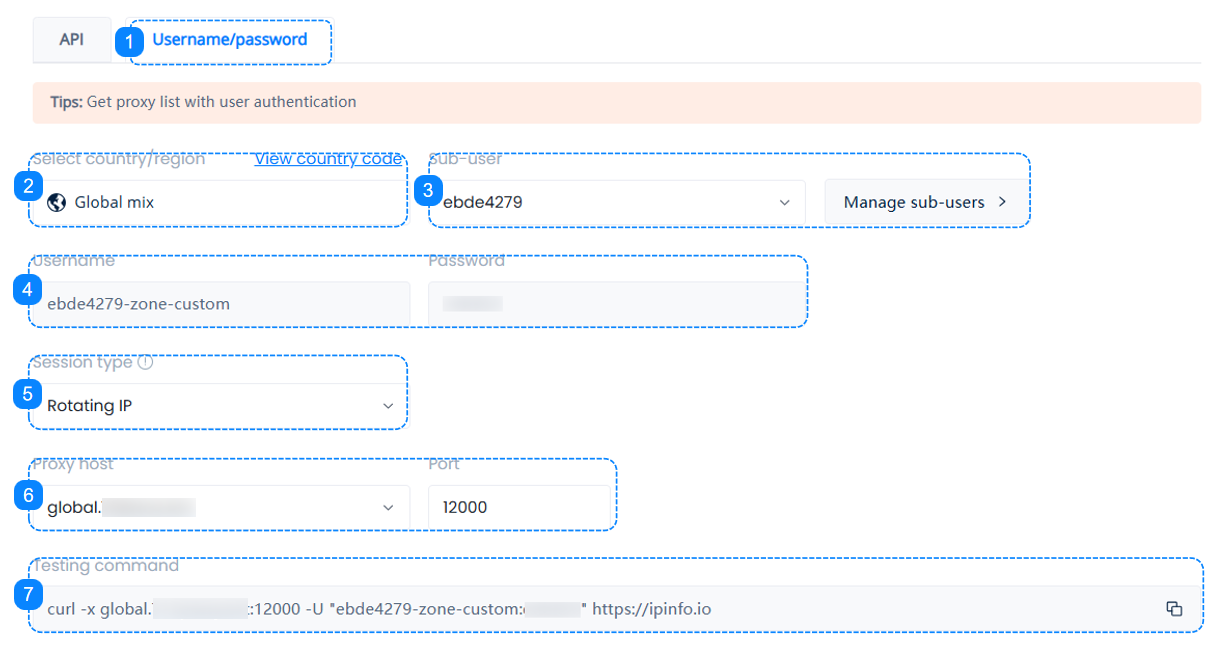
1. Click to enter the "Username/Password" dashboard to configure access parameters.
2. The country/region is set to random proxy locations by default, no need to select.
3. Choose the sub-user that will be accessing your proxies, or click on the "Manage Sub-users" button to create one. You may check our quick guide to Sub-Users.
4. Here you will find the username and password information for your chosen sub-user, these are the credentials that you will use to access your proxies.
5. Select your session type. Rotating sessions automatically change your IP with each new request made through the proxy; sticky sessions maintain the same IP for 5 to 180 minutes. If "Change IP in advance" is enabled, the IP will be changed to another one based on its actual available time; If 'No' is selected, the IP address will not be changed during the sticky time and will only be replaced after the sticky time expires. You may learn more on the Session Types page.
6. Choose your proxy host. You may learn more on the Host and Port page.
7. The Testing Command is a cURL example which you can paste into your command line to quickly test your proxy settings. You may learn more on the Testing Command page.
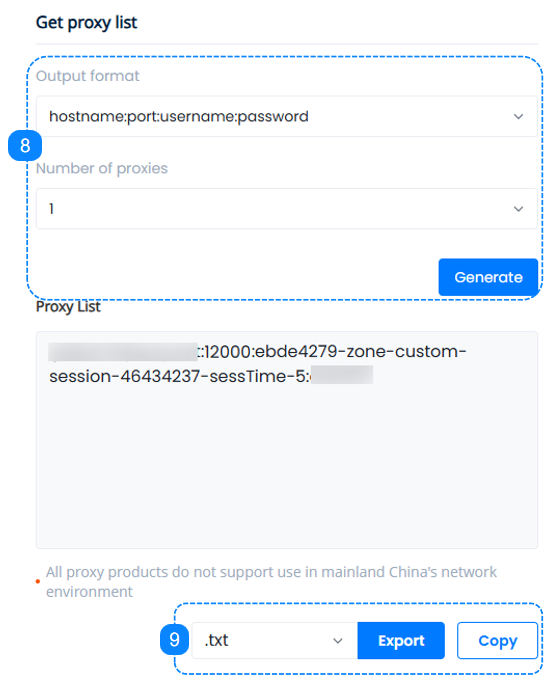
8. Here comes the essential step, on the right-hand side under "Get Proxy List", set up the correct format that suits our target as well as the number of proxies needed, after clicking the "Generate" button, we can see the specifics reflecting the selections made above in the Proxy List, you may learn more on the Proxy String page.
9. Here we can either copy the generated proxy list to the clipboard, or download it as a .TXT file or a .CSV file, which you can then apply to your software application or tool of choice and start using your proxies.
When setting up your proxies on a browser extension, it is recommended to use the HTTP protocol, rather than SOCKS5.
The anti-detect browser can support HTTP or SOCKS5 protocols.
If you need more information on proxy integration with browsers, proxy managers, tools, etc., please refer to the quick guides in the Integrations section.
Last updated
Was this helpful?